Monday, November 1, 2010

Bi-fold Coccyx Cushion

Original Piece of Foam With Cuts

I started with a piece of faom 19" x 8" x 3".  I knew I wanted the cushion to be 16" wide, so I started with this chunk.  I used my bread knife to cut the foam.  However, when I bought the original piece, they cut it with an electrical knife.  That works much better; makes a smoother, cleaner cut.  I do hope you can see how I slice this piece to make the two parts.

Cutting and Trimming the Pieces

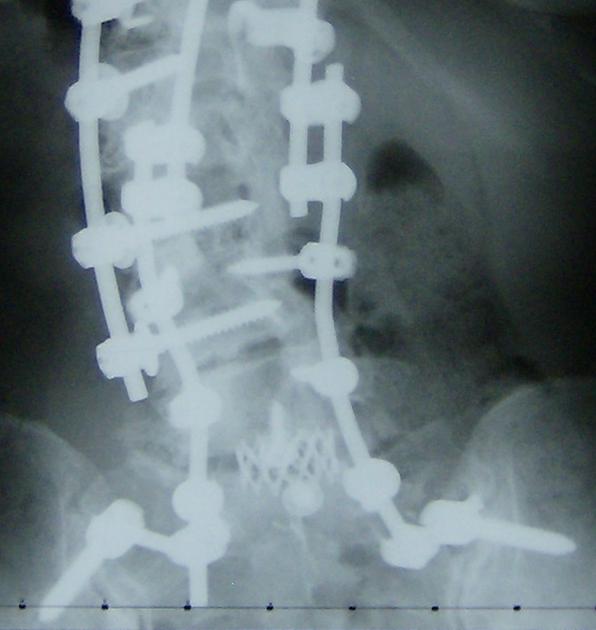
After slicing the piece of foam, I cut off the little ends and took out the chunk I needed gone in order to make it good for my spine.

Making Pattern Pieces

I made my pattern pieces by using the foam that I had cut out.  I decided the best way to insert the foam was by having the outside edges open and then closed with velcro.

Checking How the Pattern Pieces Fit

I highly recommend this step.  I found I had forgotten the seam allowance on one piece.  Better now than after the fabric is cut.

Checking How the Sewn Fabric Cover Fits

This gives a little reassurance that things are going to fit.

The Finished Cushion

I sewed the two pieces together at the center of the top.  For easy carry, it will fold on this 'joint'.  I'm sure you will do a better job of sewing.  However, the 'sitting test' gave my new 'watermelon cushion' high marks.  Very comfy.  I'm all set for that long long long trip to Houston.

What would I do differently:  allow more time, make my pattern a little more accurate, and try to work when I am not tired.  My pattern was a bit sloppy and the fit is very loose.  I could have cut those pieces a little smaller.  Just very happy it is DONE.  Done is alway good!

Friday, October 8, 2010

Quilting: Year 3 in Review

This is a review of the quilts I completed from October 2009 through September 2010.  

Blast Off
for a Fast Friday Fabric Challenge

Crazy Quilt for Morgandy

Christmas Star block
for a guild project

Cathedral Window Pin Cushion
from a guild demo

Me and My Buddies
for a Fast Friday Fabric Challenge
I printed my brain scan and then stitched away.

Crazy Quilt Purse
for my new red 3 season coat

Mermaid Study
for a Fast Friday Fabric Challenge

Whole Wall Insulating Quilt
for winter warmth and summer cool
I put a reflective fabric on the back.

Wild Rose
for a Fast Friday Fabric Challenge

Chair for Morgandy
Morgandy means 'litle one by the sea'

The Tigress in the Tortoise
for a Quilting Arts Challenge
Based on my outer and inner animal.

Egret Mobile
for a Fast Friday Fabric Challenge

Comfortable
for a word challenge

Flower Child
for a Fast Friday Fabric Challenge
Given to Morgandy's mother, Jodi, on Mother's Day

A Taste of Summer
my entry for the 2011 Quilting Arts Calender
The challenge wanted a taste for each month or season.

Colts Banner
for my grandson, Max, a BIG Colts fan.

15 Pears
for a 10x10 show and sale
I started this during a surface design workshop.

Psychedelic Fungi
for a Fast Friday Fabric Challenge

Quinceaneros:  The Dance
Celebrating 15 years of Quiltart

3 Golden Pears
made for a 10x10 Show and Sale
I like it so much, I decided to keep it.

Geode
for a Fast Friday Fabric Challenge

Rebirth: My Apricot Tree
for a Fast Friday Fabric Challenge

Artist Trading Cards
In response to a call for donations for a charity fundraiser, I made 28 ATC's.  Because of the number, they have their own gallery.

Lace
for a Fast Friday Fabric Challenge

Saturday, August 14, 2010

Alzheimer's Illustrated: From Heartbreak to Hope

During the Houston show in 2008, Diane Petersmarck ran a stay at home challenge [SAHC]. Lois Jarvis provided a piece of her Rust-Tex fabric for each of us. Then, if we used the fabric in one of the quilts, Diane's sister Beth, sent us a piece of her hand dyed silk velvet.

Basically, we all made our little quilts for Ami's Alzheimer's Art Quilt Initiative. I made 5.  I used the Rust-Tex fabric for one; the other four used photos of my face broken up in different ways.  The Rust-Tex quilt and 2 photo quilts were put up for sale during the Houston show of 2009.  I thought maybe the other 2 were not good enough, since they were not put up for sale.  The 2 kept out featured my whole face; I thought maybe that was not acceptable.  At the time I was really disappointed. 

The Changing Face of Alzheimer's 2

Recently, that disappointment turned to elation. I was told those 2 were kept out because Ami was planning a traveling show for 2011. Approximately 100 quilts were kept out as possibilities. 53 quilts were picked out of that batch to be part of the show. One of mine is going to be in this exhibit, "Alzheimer's Illustrated: From Heartbreak to Hope".  I am thrilled and honored to be part of this traveling show which starts in January of 2011.  It is a totally unexpected surprise.  

If you would like to shop Lois' Rust-Tex store, click here
If you would like some of Beth's wonderful fabric, click here.
http://quiltersstitchtogether.com/index.html

For a short time, all of the chosen quilts may be seen here
http://www.alzquilts.org/exhibit.html

PS.  I really wish I had used someone elses' face.  I'm already tired of looking at 'me'.

Saturday, June 12, 2010

15 Pears

15 Pears

This is one of the pieces I started during my week at a surface design retreat. The colors are a real divergence for me. I agreed to donate 3 10"x10" pieces for a local charity event in October. Knowing how I can not always trust my body to behave, I'm trying to do them now. One done, 2 to go.

This one has many textures and is both silk screen and free form paint applied with some little scrapers I made out of Styrofoam. The Styrofoam was the kind that food is put in at the market. This is easy to cut and shape. Hope you all try using this free material.
 
I'm not a big fan of variegated thread.  However, it just seemed to fit this colorful piece.  Comments appreciated.  What else could I have used.

Sunday, May 9, 2010

Flower Child

original photo of Morgandy (taken by her Father)

I finally finished this FFFC quilt I've been working on for two weeks. I had the concept before my week at the surface design workshop. I actually made a background for it while I was there. Therefore, it should have gone very quickly. Well almost. There were a few bumps in the road.

Although I had a photo I was planning on using. I wanted it bigger than the printout from the 8.5"x11" size that is my printer capability. To get around this, I thought I would rotate the photo. When I tried this in Picasa, I lost large hunks of the photo. I went into Paint, added some blank edges all around. Then back to Picasa to rotate it. This worked GREAT. Then I was able to trim to size. Therefore I printed the largest possible image of Morgandy on the same size paper.

Morgandy rotated after adding borders all around.
Sorry I could not show the borders added.
Apparently the file type is not compatible to this system.

Original rotated and cropped photo after some added paint.

You will notice the original photo has some hidden body parts. I painted over the photo to add those parts. At my first try, I painted the shoes with a 'shiny black' paint.  It looked more blue than black.  It took 3 coats of paint to cover that up.

This is the background that I made specifically for this quilt.

Satisfied, I tried the cut out against my intended background. Nope! That did not work. I went through my stash and found some flowered fabric I really thought would work. Nope. That was not it either. Then my small group came to the rescue. Peggy suggested I use bites of both, yet turn over the flowered fabric because it was so bright. [I love bright, gaudy and glitz.] That worked much better and became my finished background.  Thanks Peggy.  I couldn't have done it without your input.

Problems quilting were major tension problems. Of course when the machine is giving me tension problems, I also tense up. Finally I just did it. I decided to quilt around each flower petal so that it would really look like a blanket of flowers.

After the binding was on, I hated the binding. I thought the black would frame the quilt and the black jumper would pick it up. No. It was overpowering. Off with the binding. Next I faced it. That was rather quick except for the hours of picking out the batting from the micro stitching I like to use.
'Flower Child', 12" x 17.5"

detail showing dimensional flowers

'Flower Child' detail

In the end I am pleased with it. When the facing was stitched I added the intended dimensional flowers.

It is a Mother's Day gift for Morgandy's Mom. I think she will like it. At least I am happy with the outcome. I'm finishing a bit close to the gift giving deadline, but I did make it.

Saturday, March 6, 2010

Published Again

My quilt, 'The Retrospective Theater' is on page 226 of the beautiful new Lark book, "500 Art Quilts".

Now available in stores and by email order.
http://www.larkbooks.com/catalog?isbn=9781600590580

This is my quilt, 'The Retrospective Theater", 
as viewed in the "The Silver Screen" exhibit during the International Quilt Festival in Long Beach, California 2008.  [This photo, courtesy of Larkin Van Horn, is not in the book.]]

Gable and Corbert closeup. 
[This photo not in the book]

To see the photo that is published in this lovely book plus step by step of how I made the quilt, please click the following link.

Tuesday, February 2, 2010

Comfortable

Fiberarts Squared is a new group doing a 12" X 12" challenge every two months. This is the first challenge. The hostess chose the word 'comfort'. This was interpreted in many different ways.

I tried to think of what image would bring to mind some form of the word comfort. My little baby nestled on his mother's shoulder makes me think 'comfortable'. After all, what could be more comforting or comfortable than snuggled in that soft, warm niche of a mother's neck and shoulder as she cradles you in her arms.   So comfortable in fact, the baby fell asleep.

Comfortable

The 'painting' was drawn on soy milk soaked fabric using water color pencils. Even after heat setting, I found the color was not permanent. Therefore, I painted on a thin layer of medium. I then heavily quilted the face. I'm not totally satisfied with how the face came out. I drew my intentions on a print of the painting. However, sometimes when I looked up to see the quilt line drawing, I moved off my spot. What I think I really need to do is make some marks directly on the quilt. I got a liquid pen with wash-away ink. That dried up almost immediately. The marks left by chalk were too big. Suggestions appreciated.

Friday, January 29, 2010

Egret Mobile study = fabric art on the move

You have to be over 'a certain age' to remember Frank Sinatra belting out “My Way”.   I remember it well. As this project morphed from one thing to another the words, “I did it my way” kept floating through my mind.

The Fast Friday Fabric Challenge this month: something with wings, fractured, and done with only 3 colors out of the primary and secondary colors + black and white.

As I began to look at the suggestions for fractured things, mosaics appealed to me. Thinking on a grand scale I thought I would do a fractured water lily with an overlay of a dragonfly. I had some sheer fabric just waiting to be used. I found several dragonfly photos, blew one up to a size I thought I could stitch, ~20” long for a single wing. I'm thinking maybe I'll just do the wings as a mobile. By Sunday night I had finished tracing both parts of a single wing onto a sheer paper so that I could just turn it over to get the other side. Taking a break, I got something to eat. When I picked up the spoon to eat my soup, a horrible pain went through my fingers, hand and arm. I could not pick up a spoon without horrible pain. I took some Ibuprofen and sat down at the computer to read; just rocking and holding my injured arm.   I had stupidly injured myself. I definitely was not going to trace these again. Of course I was able to eat using my left hand.   Not much stops me from getting food into my mouth.

Dragon Fly Wing Drawings on my Work Table

The next day I took my drawings to a copy place. 4 to 5 hour wait. Nope. I just could not do that. Luckily I didn't do that because when I tried to stitch my sheer fabric over the paper, I could not get the paper out of those little bitty spaces. HMMM.

Butterfly Drawing with thoughts about making it into a mobile.

More research for a winged thing. I was now loving the idea of a mobile. As I surfed, I saw a GREAT plane with a man inside running across the ground. The wings were 3 high and the tail had lots of interesting pieces. I can now imagine this could really have a lot of movement. As I started drawing and planning, I realize I really didn't want a plane. How about a butterfly; hours later that was not working for me. I started looking at birds and mobiles. I did not want a flock of birds. Rather, my vision, was for one bird that I would fracture.  HMMM . . . an egret in flight.

Egret mobile with sheer bits, black wire and painted [also weighted] beak.

Finally, I have something I really like.  Luckily, I decided to do a small study instead of a LARGE piece.  Balancing the pieces was tricky for me. I used thin black wire and bent my shapes and attaching rings. I pounded the shapes a little to give them a little stiffness and help them keep their form.  Because normally these things are done using heavier materials then soldering a ring at the balance point, I added weight [extra wire] when I did my balancing. The beak is really lots of wire, wrapped, then painted. I sewed a layer of sheer fabric to each side, stopped the fray with liquid stitch, then purposefully frayed the edges, ie feathers.
Egret mobile view from kitchen.

Egret mobile from dining [now quilt art studio]

I have no idea why this is turning up yellow in this photo.  It really is two different sheer white fabrics.  I used one fabric on one side and another on the opposite side.  I sewed with a clear polyester in the bobbin and a silver thread on top.  As I researched fabrics, polyester is the most resistant to sun and age deterioration.  This was the reason for my fabric and thread choices.  This is so lightweight that it is continually in movement = success for a mobile.

Remembering the goals of this group: “it is through doing that we will learn.” Yes, I learned a lot. Plus, the end of the challenge always states something similar to , “remember to have fun”. Please note it is the Fast Friday Fabric Challenge; not a quilting challenge.

Yes, “I did it my way. . . "

Saturday, January 23, 2010

Morgandy's First Birthday gift

For a few hours on Mondays, I babysit  the adorable baby next door. Today is Morgandy's first birthday. For this occasion I created a new rocking chair back to replace a rattan one that had been punched out by a 4 year old boy. Of course I've had this chair for a while. I took all the loose joints apart and re-glued them. It is now really sturdy. Then I pulled off all the bits and pieces of rattan. After a final cleaning;  I got my canvas and began painting.


Morgandy means 'Little One by the Sea.' So of course I painted a little girl at the edge of a big body of water. I used unprimed canvas and acrylic paints. I knew this would work because I painted a skirt with acrylic paints 30 [or more] years ago. They do make the fabric stiff, but in this case it would make it better to be stiff. I do not like acrylics for my regular wall quilts because I do not like the stiffness. The painting is simple, and was easy. The assembly was hard. The back is larger at the top than at the bottom; it is also curved.  Because of my distracted, grieving mind I first sewed it together making the top 1" too narrow. This is tough stuff to sew, but rips out easily. Then of course I had to repaint a bit to cover those lines. After sewing to the correct size, I trimmed the corners and turned it right side out. This is very hard stuff to work with. Getting it turned right side out is a job in itself. I intended to quilt it. However just stitching a band around the edges, was difficult. I used a #16 needle, the largest I had. At this time, I decided not to quilt. It was even difficult to bury the thread from this little bit of sewing. However, by stitching that band, I had 4 pieces of canvas acting as one at the edge where it will get the most strain. I think it is strong enough for a little girl.
.

Then I used carpet thread to sew it into the existing frame. That was the hardest job. After I had the top installed [little over 8 hours], I wished I had my old grommet maker. If you are going to do something like this, and I highly recommend it, use grommets to line up with the holes and then it can easily be laced into place. I feel writing about my mistakes, helps any reader avoid them. One of those, "do as I say, not as I do" sort of things.  I do hope this was a good learning experience for you; it sure was for me.

Wednesday, January 20, 2010

Quilting Arts Publication

 I was absolutely thrilled that my quilt, "The Retrospective Theater" was published in Quilting Arts Magazine, October\November 2008, page 53.  Somehow the post I made soon after was lost, so I'm reposting because I have another BIG honor to brag about which is coming soon.