Showing posts with label FFFC. Show all posts

Saturday, July 12, 2014

The Drones Quilt Project

My Block
a scant 10" x 10"

How this project started is copied from
http://www.popularresistance.org/radical-quilting-contribute-to-the-drones-quilt-project/


"The idea for a Drones Quilt came from some women in the UK who started the project as a way to memorialize the victims of U.S. combat drones. We believed that there were lots of anti-drone activists in the U.S. who would like to make our own version of a Drones Quilt, and so the idea traveled across the Atlantic.
The idea is to collectively create a piece of artwork which connects the names of activists with those killed. The names humanize the victims and point out the connectivity between human beings.
Plans for the American version of the quilt include creating educational materials, photographs and information which together with the quilts will create an exhibit which will travel the country, informing and educating the American public.
Sadly, according to the Bureau of Investigative Journalism, only about 20% of the drone victims have been identified, so there are many, many victims whose names are not known."

Several months ago I saw either a video or a television program interviewing Drone operators.  Most said it was similar to a computer game:  they had a target assigned, the object was to send a Drone to blow up the target.  It did not feel 'real' to the operators.  Then one of the operators sent a Drone going to the assigned target.  Just seconds prior to the 'hit', two boys on bicycles drove into the target area.  The operator saw them explode.  That became a nightmare for him.  The reality of the 'game' sank in.  He quit his job.  At the time of the broadcast, he was in therapy.
When I heard about this program via my local Brunswick Peace Works, I knew it was for me.
I hope my block does not need explanation.  However, because I am so close to it, I can not experience it with fresh eyes.  PLEASE leave a comment about your reaction to my block.  All comments will be appreciated.
I will mail it as soon as I know that it is understood as is.  Otherwise, I will make another.

For more information on Drones and this project in particular check out these links
warisacrime.org/content/drones-quilt-project
www.dronesquiltproject.wordpress.com
dronesquiltproject.wordpress.com/how-to-make-a-block/

For more personal information OR to send a block, PLEASE contact


and/OR mail a 10" x 10"  block to

Leah Bolger, 3740 SW Western Blvd, Corvallis, OR  97333
VIEW MORE

http://www.popularresistance.org/radical-quilting-contribute-to-the-drones-quilt-project/

http://www.veteransforpeace.org/who-we-are/member-highlights/2013/04/04/us-drones-quilt-project

http://wilpfus.org/news/updates/drones-quilt-project-memorializes-victims-educates-public

Thursday, February 20, 2014

Blue Rose

 Blue Rose Center

Below is the third sketch I made for this answer to the Fast Friday Fabric Challenge.  It was my turn to create the challenge.  Something Blue with black, white and one other color also allowed, but not required.  The main thing is that one should think 'blue' when looking at it.  When the 'Coming Up Roses' exhibit was announced, I decided on this blue rose.

I wanted to create something dimensional.  This is my first try after seeing the wonderful dimensional flower quilts by Barb Forrister at Houston last fall.  I also attended her demo and got to meet her.  What a thrill.  She makes it look easy.  However, I found I ripped out a LOT.  If I had more of the blue satin, I would have just cut more.  Having a limited amount of fabric really pushed my creativity.  


College of Working Parts

Clockwise from top left: sketch,  blue satin strips to enlarge the 'bud', top of one of the 'petals' showing how I stitched the petal over, then held it in place with gold thread, back of the 'petal' and 1/2 yard blue satin [- a small chunk].  

I have been experimenting with different ways to finish out the quilt.  I have already thrown out three tries.  Because of my fabric limit, I try ideas out using other fabrics.  However, for me, the blue satin is the only fabric from my stash that works. Perseverance is the name of this game.

Saturday, March 9, 2013

Golden Swirl Cushion

Golden Swirl Cushion
 
I started this as a response to a Fast Friday Fabric Challenge.  It never got to the cushion stage because it was way too large.  I had based the size on the old cushion.  However, because the edges had cording, it had to sit absolutely flat to look good. 
 
Previously, I had cut the top down and carefully taken the cording off and totally apart.  The other thing I did not like about the original was the way the ridges in the cording stood out.  This time I wrapped the cording in raw, but washed, canvas.  The cording now has a nice smooth look. 
 
Why does it take me so long?  I spent almost 5 hours just finishing this up.  The good thing is that it sits nice and flat, not bunched up on the edges of the hanging chair.
 

Cushion in-situ
 
The original cushion top with a circle drawn where it needed to be cut down.  The colors here are more accurate than the photo above.

This is seventy, number 14.

For more information on "seventy", please see the post below.


Saturday, February 23, 2013

Cottage Door

Cottage Door
4" x 6"
 
When the FFF Challenge came out, I was excited.  I had taken about 1,000 photos in Carmel between Christmas 2011 and New Years Day 2012.  I was so disappointed that the wedding photos were so awful, I had just stuck the album away on my computer.  Now, I had an excuse to examine it. 
 
Friday evening I went through lots of building, door and window photos. Finally, I found this little turquoise door which enchanted me.  I printed it using my Epson pigment printer late Friday night.  I thought I would just 'stitch it up' in the morning.  Almost 12 hours later it is done.  In person, it is tactilely dimensional.  I stitched in layers similarly to what I did in 'Nine Patch in White'.  http://designerann.blogspot.com/2013/02/nine-patch-in-white.html
 
 
I love the idea.  However, I thought I would go nuts stitching the window panes.  I will NOT be doing that again.  I got very tired of the stitching when it was only about 1/3 done.  Hopefully, it is a lesson learned.
 
Although I like it.  It was way way too too much work for the final result as a post card.  I think it would not have been any more work to make it in a larger size.
 
This is seventy, number 9.  Please see the following link if you want more information.
 

Thursday, February 21, 2013

Golden Rectangle

Golden Rectangle
17 3/4" x 25" fat
 
Like a lot of you, I got the idea for this quilt while making another quilt.  While I was making my response to the FFF challenge, I thought about making another quilt using the Golden Rectangle as my subject.  Immediately after finishing One Yellow Square, I started this quilt.  Sewn into the gold golden rectangle are 2 other golden rectangles.  The gold golden rectangle also is positioned within a golden rectangle outlined by the gold painted fabric.  Originally I was not going to have any borders.  However, when I got into the quilting stage, I realized it needed a double border.  Very seldom does my original idea end up as I thought it would.  It is really a square cornered rectangle.  However after shooting about 50 photos, I decided I just needed to post.  When my new studio is completed, I will have a wall of sound board to use for design and most excitingly use for pining up my projects for photographing.  At the moment I am shooting blind down at a table.


Golden Rectangle detail
 
This was double layered and stitched before it was added to the whole quilt.  Because of all the extra batting, it is well raised from the rest of the quilt.
 
For more information on the Golden Rectangle, check out these sites.


This is seventy, number 8.
 

Wednesday, February 13, 2013

Nine Patch in White

Nine Patch in White
Framed in Black Metal 12" x 12"
 
I am really enjoying exploring the ways that texture and depth can be explored.  Besides the raised nine patches, I have used fringed selvages, cording, and decorative trim.
 
Texture View

I darken this view a lot in order to show the depth and texture of this piece.
 
 
Back Showing Depth Technique
 
I used a firm polyester batting for the squares.  I then stitched around them from the front.  Following this, I cut alway all the fabric and batting not in the squares.  This was because I wanted the squares to physically stand out.
 

Ready for Final Quilting
 
This is also posted at Off the Wall Friday
http://ninamariesayre.blogspot.com/


This is seventy, number 6.
http://designerann.blogspot.com/2013/01/one-black-square.html
 

Friday, December 28, 2012

One Yellow Square

One Yellow Square
10" x 10"
ready for framing

One Yellow Square
view to show depth and texture

I had a dream last night about creating a quilt with one square. I thought it would be red, but I was not sure. This dream puzzled me. I wondered what the Fast Friday Fabric Challenge would be. When I finally got my computer working, I got goose bumps when it was something to do with numbers.

After reading all of the information, looking at all the sites, and finding out by my birthday, my number was 2 I was stymied. I've been making charity quilts non-stop for a few weeks now. I'm bored. Don't get me wrong. I enjoy knowing that they will be going for a good cause. However, the sewing to a set pattern is wearing very thin.

This challenge came just in time to exercise a bit of creativity. I had purchased some plain and non floral fabrics before Christmas. Now they were all washed and ready to be used. As I read the descriptions, the number 1 made the most sense to me = power, passion, determination on one view as well as "... developing your own will, individuality, decisiveness, and expressing your creativity,..." on another view. Of course I could not get the dream out of my mind. 
 
I wanted the square to stand out visually as well as actually.  I also wanted the strips to be varied in width.  I really had fun with this.  I think now I will work on a small series.  I have discovered that I really enjoy making this type of quilt.
 
 
PS. Does anyone know where to buy good quality metal frames at a good price?

Friday, November 30, 2012

Golden Swirl = Possible UFO?

Golden Swirl
 
This is my response to Fast Fabric Challenge #75, "Falling in a Golden Swirl".  Unfortunately, I just lost the LONG write up and really do not want to do it again.  So just the basics.  PS.  These colors are the accurate ones.  I shot this under my daylight flourscent bulbs.  The chair photos were shot with regular bulbs as lighting.  Notice the huge color difference.
 
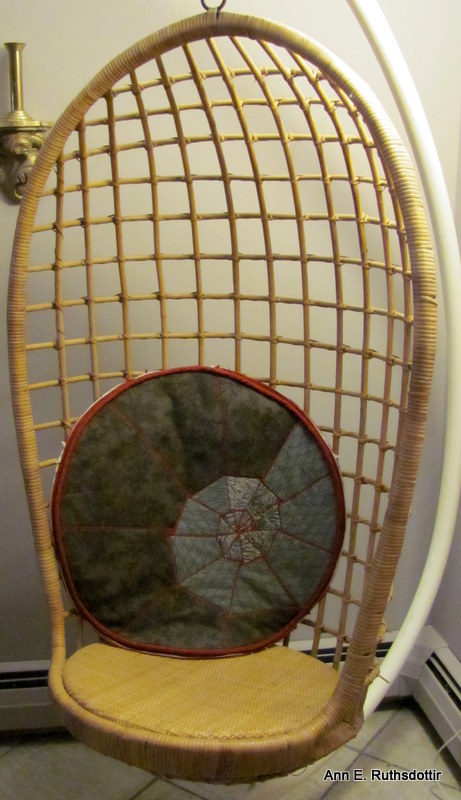
Hanging Chair with Old Cushion
 
I got the idea for the design while cleaning. My hanging chair had the cushion I made ~ 40 years ago. Then it blended with my colors; now it was an eye sore.
 
New Cushion is Too Large
 
After consulting with my cousin Carla, who makes beautiful home decor things, I was convinced I should try to put cording around the cushion. I thought this would really improve the look. Unfortunately, I did not try the cushion in the chair before I spent several hours making and attaching the cording.  Luckily, I finally did try out the size for fit before I added the back.  Obviously it is too big.  If I had not added the cording, I may have been able to smush it into the chair.
 
Old Cushion on Top of New Cushion
 
As you can see, not only is the old cushion a lot smaller, it is not even circular.
 
What to do?
 
 
Cushion as a Pillow

I am not very fond of this alternative.  I have decided to add it to my growing pile of UFO's so that I can return to my quilting for hurricane victims.  After all, they need bed quilts a lot more urgently than I need a new cushion.  I'm thinking that if everyone in my Quiltart group, made just one bed quilt, we could cover half the folks who lost everyone in the Sandy storm.


Friday, September 7, 2012

A Friendly Family of Five Fabulous Fish

A Friendly Family of Five Fabulous Fish
Frequently Travel with Two Terrific Tagalongs
36" x 47"

A Friendly Family of Five Fabulous Fish
Front end view to show dimension


A Friendly Family of Five Fabulous Fish
Back end view to show dimension

This summer has passed very quickly in one view and very slowly in another.  With my first guild meeting next Thursday, I decided I better use my challenge fabric.  That fabric is the gray, off white and blue-white print used for the fish.  We had to use some of each plus we were allowed to add up to 3 different fabrics.  No other restrictions.  I immediately thought I would do a large blue heron.  So much for that idea.

When the Fast Friday Fabric Challenge came out = a group of something, I got this fish idea.

Since I am very behind in my charity quilts, I wanted to 'catch up'.  This quilt serves all of those purposes.  I would really like to know the age and sex of the person who picks this quilt.  It is very unlikely that this will happen.  I just hope it makes the recipient smile.


Because I am thinking it may be washed a lot, everything is faced and stitched down tight.  There are NO raw edges, loose threads of anything that might 'wash out'.

Installation view at

http://designerann.blogspot.com/2013/03/camp-sunshine-and-quilt-installation.html


Thursday, August 16, 2012

Blue Horned Violet


Blue Horned Violet
9" x 9"

My Mom's favorite color was blue.  My dear friend Deborah also likes blue a lot.  Thinking of both of them as I debated how to respond to the latest FFF challenge of a flower in the mode of a painter.  I chose to do a Horned Violet ala Georgia O'Keeffe.  I also remember when I transplanted a LOT of these violets around a large bush in our back yard.  They grew and thrived; maybe too much.  However, Mom loved them.  Precious memories.

Since I lost my Mom on July 20, I've been struggling with a LOT of emotions.  This challenge and the thread painting [which was boring], has helped me cope.  Deborah's birthday is August 16.  Hope she likes this little 'painting'.  If she doesn't she can choose from something else that I will be creating in the small category.  I will be creating many more small items for a one person show next year.

Wednesday, June 27, 2012

Wedding Memory Quilt

Wedding Memory Quilt Pillow Top

I wanted to make a small memory quilt in appreciation of the wedding invitation.  I figured I would just stitched them as a straight top with filler between.  Then when the FFF Challenge came out, I totally changed my thinking.  This Gestalt challenge made a BIG difference in my design = turned it upside down.  I wanted the photos to look as if they were casually dropped on a table.  Of course, they were carefully arranged according to the Gestalt principals of Similarity, Proximity, and Alignment.

The Wedding Ceremony Booklet top is on the top, touching the family, who are now united by the marriage and the couple.  The wedding group photo is on the bottom of everything, because although important, it is subservient to both the couple and the family.  The father-daughter photo is parallel to the couple [they are still close, yet have a very different relationship], but not touching.  I chose this photo of the couple as they were both intently looking at each other.  The small center bottom photo is of the couple lighting the unity candle, another symbol of their pledge of troth.

I had this all laid out 2 months ago when I took it to a guild meeting and someone commented, "Those photos are very antique looking.  Why don't you just tuck a little lace under to complete the look."  Wonderful suggestion.  However, it is not that easy "to tuck a little lace under".  The corners need to be square, matched  and aligned.  I also was unsure of the fusing medium, so when I asked the quiltart group, I found I needed to use Mistyfuse Ultraviolet.  So then I had to wait for the mail.  Then life interrupted.  Now, happily, it is finished.

Monday, March 26, 2012

Golden Sunrise

Golden Sunrise, redone

Not happy with the quilted sky, I ripped it out.  After steaming out the stitch lines, I used gold metallic thread to tie the sky in a circular pattern emanating from the sun.  Difficult to see because of the metallic and the camera's reflection, it does add a small bit of texture, while allowing the atmosphere to just be more as Turner would have done it.


Golden Sunrise
10" x 10"

The challenge is to capture the essense of  'Turner's Light.' As I look at it now, I wish my golden thread was not so heavily stitched.  However, I just spent the afternoon [and last night] ripping out one quilt; not ready to do another even if it is really small.

This is my third try at this challenge.  It is miles better than the other two.  However, I now have more ideas to attempt.  It seems one painting/quilt always leads to another.

Tuesday, February 28, 2012

Window Study 1

Window Study 1
10" x 10"

The Fast Friday Fabric Challenge was to use a photo of our choosing to sketch the lines to become inspiration for a quilt.  The colors were to come from another photo we used for photo inspiration.  To quote Cynthia Morgan, the "Challenge: Use the element of Line and the 3 elements of Color (Hue,Value, Intensity) in a design study piece. You will need 2 inspiration sources:  one for line, another for color."

Photo Inspiration and Sketch-Tracing

Color Inspiration
These colors came from a Rights Managed photo, so I am not posting that.  It is a photo of a spectacular fire works display over a body of water.  Besides lighting up the sky, the colors are reflected in the water.  I had to deviate from these somewhat because I do not have many bright colors in my stash.  What a dull stash I have.  I am working on getting bright colors.

Thursday, February 9, 2012

Fat Cat and Mousey

Fat Cat and Mousey
32.75" x 39.5"

As you may have already guessed, this was a FUN project!  It is my response to a Fast Friday Fabric Challenge.  It is also my February charity quilt.

This started out as a comfort quilt for my guild's stash.  Unfortunately I had serious stitch tension problems which required me to apply glue on the back of ALL the stitching so that I didn't have to worry about it coming apart.  The glue made the back a bit stiff and scratchy; not much for a comfort.  My present idea is to find a place for it as a wall hanging in a hospital children's wing.  Someone at my guild mentioned the Barbara Bush Center in Portland, Maine.  Too far for me to drive, so I'll try to connect by phone to see if they might be interested.  I'll write a follow up, if and when, this happens.


Fat Cat and Mousey side view

The eyes and nose were freezer paper turned applique.  I never thought I would ever used this technique which was demonstrated last year at one of my guild meetings.  The ears were make using the pillow case technique then attached to the quilt.  I did this before I quilted.  However, it would be much easier to add them later. 


Fat Cat, closeup of face and tail

The whiskers were added after quilting because I wanted them to be really secure.   When I sewed the tail seam, I also sewed in two pieces of polyester quilt batting. I wanted the tail to puff out; didn't want to worry about the stuffing shifting.   It was a bear to turn inside out, but I do like the effect.  I stitched the tail down after quilting; leaving just a short end free.  The ruffled collar was created separately then attached to the quilt top.


Mousey

Mousey was created separately from a very simple shape, then stuffed with lots of polyester to keep the nice fat shape.  To get the tail to curl, I made a loop and left it for a while.  Fat Cat's paws have velcro on the ends for holding Mousey or some other object of a different size and shape.  The nose and eyes are heavily stitched.

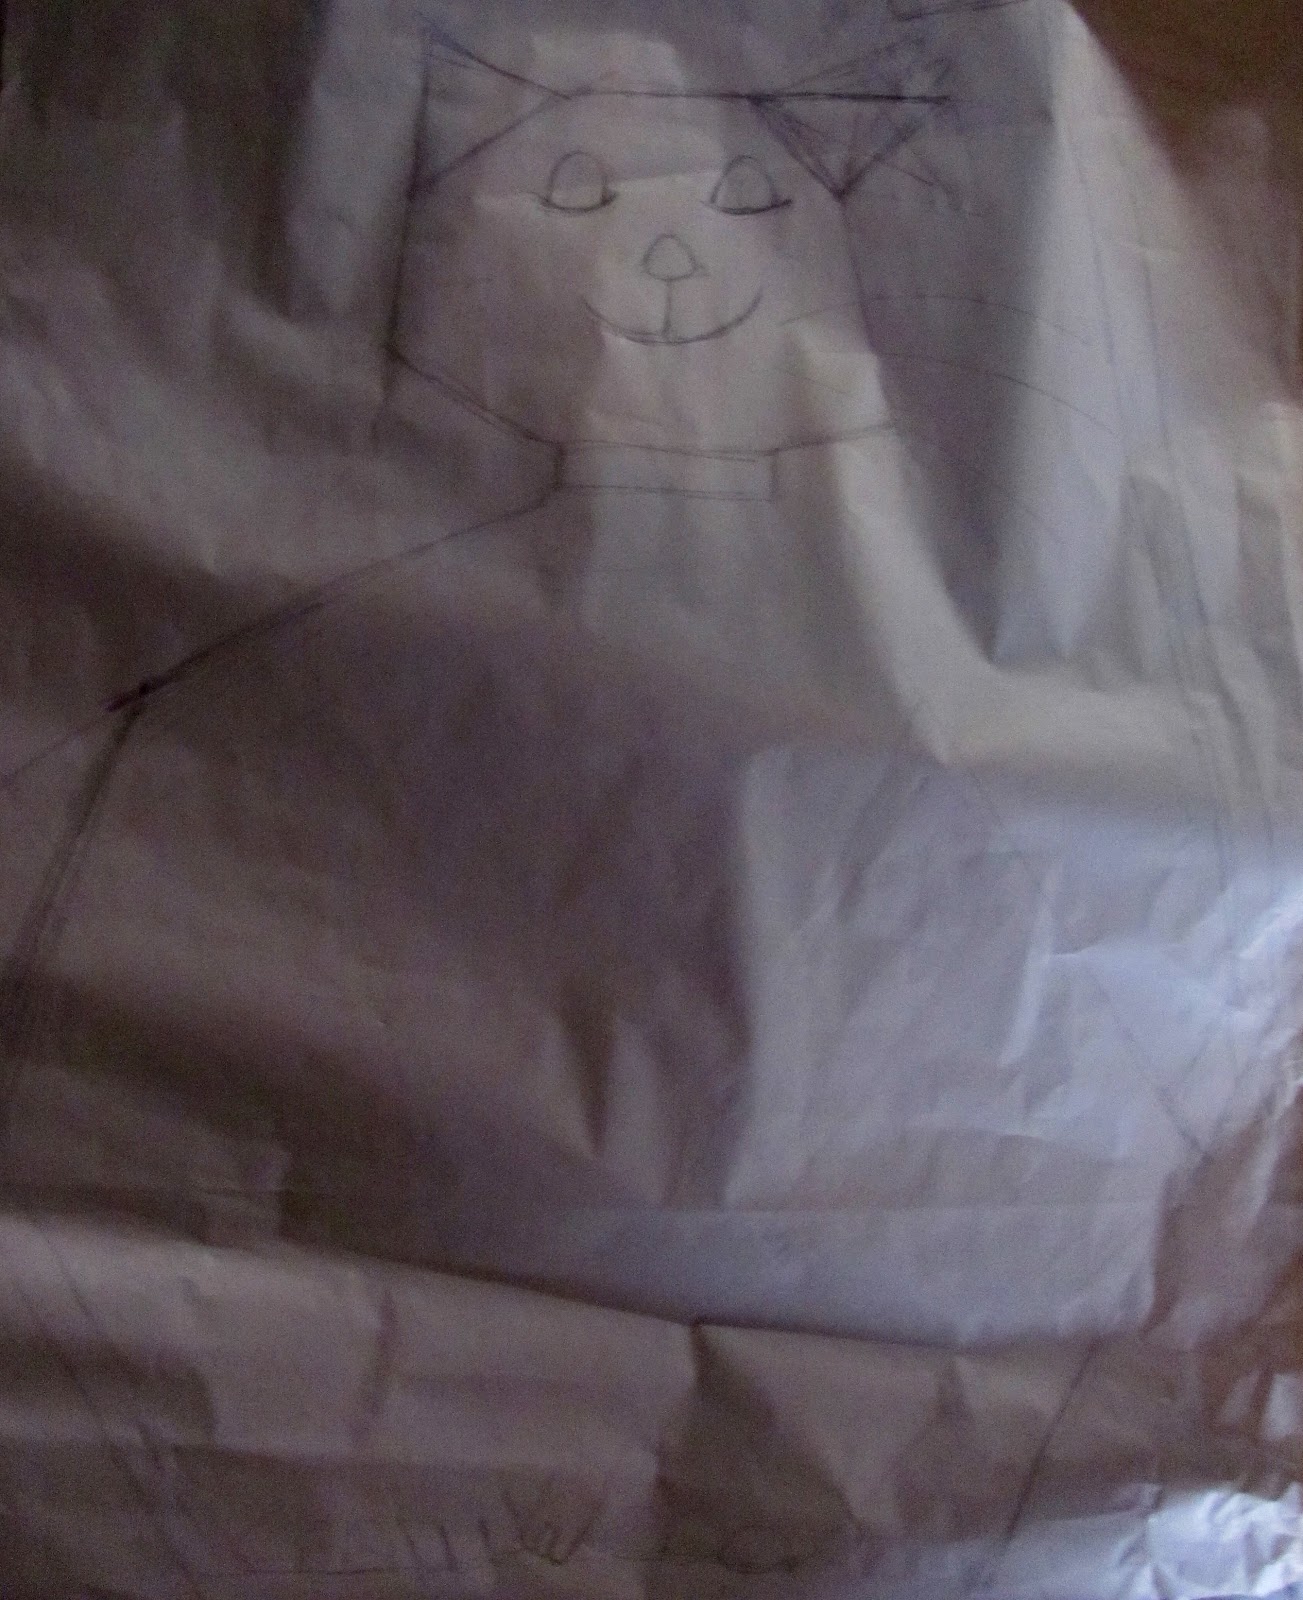
Sketch/Pattern for Fat Cat

I used a large piece of newsprint to sketch what I hoped would be a charming, comical, playful cat that might appeal to a young child.  During the construction stage I cut the sketch apart.  I marked connection lines where two pieces would join.   Then, I cut and sewed; making several changes as I went to ease construction.

I took this quilt to my guild meeting tonight.  I was soo disappointed that no one liked it very much.  I love it.  Hope children will too.

Sunday, January 29, 2012

Think Like a Child

The FFFC this month is "Think Like a Child".  What FUN I'm having!  It will be a while before this quilt if finished, but I could not wait to share one small part of it.

Mousey is going to be a part of this FUN quilt.

Before I am able to quilt the top, I need to bind my January charity quilt and quilt another persons' charity pieced top.  I volunteered to quilt charity quilts for those member of my guild who have a real problem with this.  I have limited the number so that I am not over whelmed.

Tuesday, January 17, 2012

Traveling Cape

Traveling Cape, 3/4 front

My cousin Tom's second son got married on January 1, 2012 in Monterrey, California.  The location, the brides hometown, was absolutely gorgeous. I planned to go early to visit galleries and other interests in Carmel.  Knowing the weather changed dramatically from Maine to California and also each day in Carmel; sun = warm; breeze after night meant chills.  This wool cape was the perfect thing for the visit.  It traveled well as a blanket, sides flung back it adjusted to the afternoon sun, closely wrapped around me, it warmed me each evening.  It worked well!  I also love the design which is in the style of Mondrian, to fit an Fast Friday Fabric Challenge 3 months ago.

Traveling Cape, back


Traveling Cape, side

All the wool was recycled from clothing either in my closet, Salvation Army, friends, or thrift shops.

Saturday, December 17, 2011

Red Rhythms II

Red Rhythms II

After completing the first Red Rhythms,
I had a few strips and some pieces of red left over.  Not one to let anything go to waste, I sewed up the red pieces to make another charity quilt. I had used all of the red to back and bind the first quilt.  This time I found a wonderful yellow-red-blue paisley for the back and a nice red with yellow for the binding.  Nice and colorful for a baby.

 
Although the first went to Japan, this one is going to our local guild charity reserve.  One person in the guild is in charge of all of these quilts.  She is listed as the contact person for fire departments, police departments, hospitals, nursing homes and others who might have a need.  One of the things I really love about my guild is their willingness to make and give quilts to those unknown folks who develop a need.  Always gives me a bit of JOY to be able to share.

Wednesday, November 30, 2011

Mondrian Inspired Purse Design

The Modrian Inspired Design
Everything is glued, nothing yet stitched.

For a couple of months now I've been working on the FFF challenge 61, interpreting an artist's style.  I decided to go large.  Although I still want to finish it, I had so much fun making the first bag, I decided to try another one.  The bonus is that it is small enough to actually finish in a few days.  The first problem I encountered was the grosgrain moving all over the place even though it was glued.  I decided that was because the wool still has a lot of stretch and my even feed foot was not really feeding so evenly.

I used recycled wool jackets, skirts, and odd bits of wool that I felted in my washing machine and dryer.  It is really soft to the touch.  Felting seems to take out all the rough stuff.  I added grosgrain ribbon to cover the seams; wider grosgrain as the final edging. All was stitched down with zig-zag using polyester thread because I both wanted to cover up the grosgrain and add a sheen.  I first tried to use another stitch on my machine, but after many, many birds nest on the back side, I decided the zig-zag would have to do.  The lining is black satin: pocket on one side for my cell phone; pocket on the other for my charge card case.


Purse Full View
I had a lot of problems deciding how to do the strap.  My first, planned idea didn't work at all.  I tried 3 more before I did this one.  Not as elegant a joint as I would have liked, but it works rather well.  The handle attachment added a day and a half to the project.  Luckily, I have an ergonomic seam ripper. 


Purse, Flap Side
Finished, closed the body of the purse is ~ 7" x 9".  Under the flap, this side is gathered on both sides and bottom.  This allows the contents to settle easily and not disturb the ornamental design. 

Purse, Design Side
Not sure which is the real front or real back.  My preference at the moment is to put this side out. 

Saturday, November 26, 2011

Silk on Velvet Purse

The Art Piece

As I started this design, I had in mind that it eventually would become a purse.  I was given a gorgeous piece of burgundy velvet [my friend Alex bought it at an estate sale for 50cents], I had some tiny cones of silk yarn, some iridescent seed beads and an idea.  I had never done any couching before, but this silk begged to be put with this velvet.  The FFF challenge was " chiaroscuro".

I first put a piece of velvet and stabilized in a hoop.  I could not get that under the foot of my machine.  Then I stay stitched the velvet to the stabilizer.  That seem to keep the velvet in place.  Velvet seems to have a life of its own as it slides and frays all over the place.  As I began to couch the silk yarn to the velvet I loved the look.  It is lush!  I had absolutely no idea I was stitching the shape of an onion cut pole-to-pole; I just liked the shape.  It wasn't until I took a break for a dinner of my Oven Roasted Onion Soup,  http://designerann.blogspot.com/2009/05/oven-roasted-onionsoup.html , that I realized after peeling and cutting over 4 pounds of onions, that shape was definitely in my mind.

After dinner I added the seed beads to bring out the dimensions of the velvet-polyester batting-satin layers.  The beads are dark, but just the right touch to fulfill the challenge.  Today I finished making this work of art into an Arty Purse.  I plan to use it New Years Eve at a wedding rehearsal dinner.

The Arty Purse Hanging on My Design Board


The Arty Purse Sitting on a Table

Saturday, September 10, 2011

Art Deco?

Done
I usually title my designs.  This one took me soo long, I call it 'Done'.

I started this little piece last spring.  Then I had a series of medical interruptions.  It was started for a Fast Friday Fabric Challenge titled, Art Deco.  I think my original design hit the mark.  All I intended to do was stitch in the ditch so the design popped. 
Pieced Design


However, I could NOT get the tension adjusted on my machine. The more I stitched, the more out of whack it got. I had lost a LOT of my incentive for finishing this. Yet, it was something practical I really wanted to use.
After marking a bunch of circles flowing across the design, I stitched those several times around using white thread until I felt they stood out enough to make the design show.  It was rather subtle.  Next, I picked out a thread color that is in my wall.  Then I really stitched it within an inch of its' life.  Now the real FUN began.  I took out my buttons.  No real whites, so I used these small off white ones.  I really wanted gray and purple.  I had bought a set of purple buttons and also some tiny gray ones.  I needed something that would POP.  Like any good Artist, I looked in my closet for buttons that would work for this quilt.  I absolutely love the steel gray ones.  I rarely wore the wool jacket.  Now I have more wool for wool stash.  I found a few more purple ones on a sweater I never wear.  That will be re-purposed later. 

I laid my buttons out on my design; then I fiddled for hours.  I held them in place with the yellow headed pins.  I liked the accent, so decided to use white embroidery floss on all of the buttons.  I actually only had to take off one button that didn't work out.  That amazed me.  This is my first time using buttons as a design element.  Attaching them took 2 days because I had to pull the large needle through with pliers.  The tiny gray ones required a small needle, so I just went through several times. 

Am I hooked on buttons?  Not sure.  I think each quilt will have to speak to me and tell me what to do, just as this one did.

Finished Art Quilt in Situ