Showing posts with label tutorial. Show all posts

Sunday, November 9, 2014

Blue Rose

Blue Rose at IQA Oregon

This quilt started backwards from the usual way I work.  I started by creating the center of the rose, created the 'petal parts' plus the 'petal edges', then stitched down the background.  As often happens, the designed changed along the way.  Unfortunately, I have lost the name of the QA member who graciously sent me this photo.  Thank you  so much.  I LOVE 'seeing' my quilt in the show.  Could not do this without your help.  Hope I can do the same for others sometime.

Rose Bud + Center

Each petal section was quilted before it was attached.  This gave the body plus dimension I wanted. I used the black to further extend my limited amount of blue satin.


The Method overview

Sketch, Petal detail, and the rest of the satin.  I sketched the 'petal edges' in curves on the satin.  This way I was hoping to get as much usable satin as possible.  It worked.  


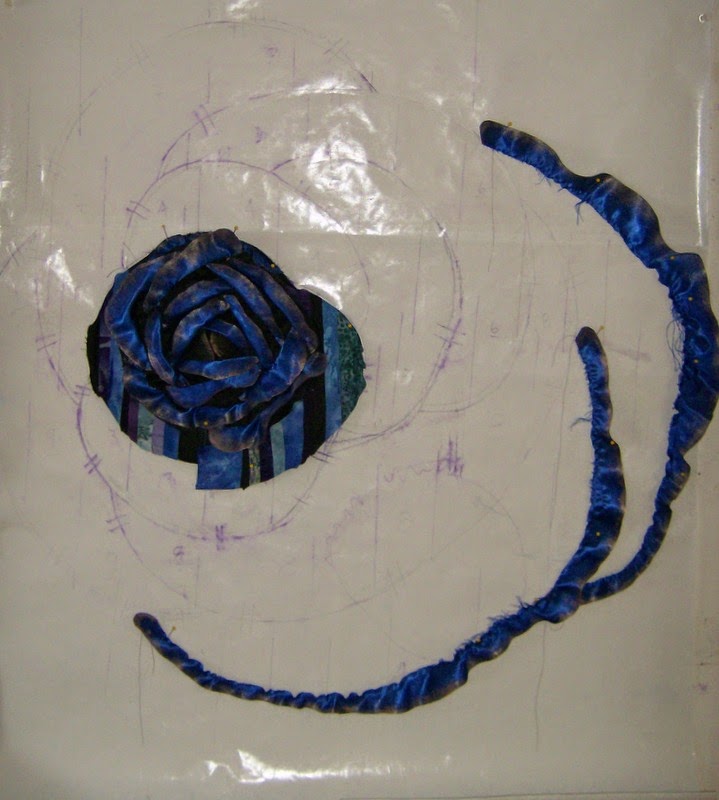
Blue Satin laid out on freezer paper

The rest of the blue satin was cut into strips, edged with gold paint, then gathered to complete each of the petals. The petals were sized according to the lengths of 'blue satin edging'.


Method of Strip Piecing on the Paper Pattern.  

I wanted the colors to get lighter as the rose grew.  I also wanted the strips relatively vertical.  In hind sight, I wish I had made then radiate outward from the center..  The problem was, I could not figure out how to do that and still get the color change I wanted.

All the Petals pieced, then ironed on the freezer paper for ease of turning under the edges.  

Layout with Outside Strips Stitched down.

Now I stated adding the completed petal sections.  I tucked the blue satin edging under as I went. Then machine appliqued the outer edge. All of the pieced were marked with a number.  This was necessary to match up the satin with the strip pieced petal.  Finally, it was ready for quilting.  Lots of quilting completed my project.  I thought it was going to Houston after Oregon.  Unfortunately, I was wrong. 


Blue Rose
41 1/2" x 64"

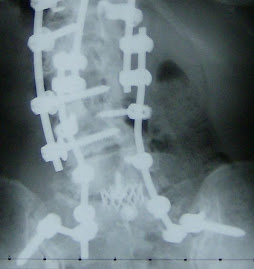
Besides some unexpected medical challenges, plus necessary unplanned work, plus the endless hours to complete this quilt,  I had no time to make anything else.  Hopefully, I will plan better next year.

Wednesday, February 13, 2013

Nine Patch in White

Nine Patch in White
Framed in Black Metal 12" x 12"
 
I am really enjoying exploring the ways that texture and depth can be explored.  Besides the raised nine patches, I have used fringed selvages, cording, and decorative trim.
 
Texture View

I darken this view a lot in order to show the depth and texture of this piece.
 
 
Back Showing Depth Technique
 
I used a firm polyester batting for the squares.  I then stitched around them from the front.  Following this, I cut alway all the fabric and batting not in the squares.  This was because I wanted the squares to physically stand out.
 

Ready for Final Quilting
 
This is also posted at Off the Wall Friday
http://ninamariesayre.blogspot.com/


This is seventy, number 6.
http://designerann.blogspot.com/2013/01/one-black-square.html
 

Monday, November 1, 2010

Bi-fold Coccyx Cushion

Original Piece of Foam With Cuts

I started with a piece of faom 19" x 8" x 3".  I knew I wanted the cushion to be 16" wide, so I started with this chunk.  I used my bread knife to cut the foam.  However, when I bought the original piece, they cut it with an electrical knife.  That works much better; makes a smoother, cleaner cut.  I do hope you can see how I slice this piece to make the two parts.

Cutting and Trimming the Pieces

After slicing the piece of foam, I cut off the little ends and took out the chunk I needed gone in order to make it good for my spine.

Making Pattern Pieces

I made my pattern pieces by using the foam that I had cut out.  I decided the best way to insert the foam was by having the outside edges open and then closed with velcro.

Checking How the Pattern Pieces Fit

I highly recommend this step.  I found I had forgotten the seam allowance on one piece.  Better now than after the fabric is cut.

Checking How the Sewn Fabric Cover Fits

This gives a little reassurance that things are going to fit.

The Finished Cushion

I sewed the two pieces together at the center of the top.  For easy carry, it will fold on this 'joint'.  I'm sure you will do a better job of sewing.  However, the 'sitting test' gave my new 'watermelon cushion' high marks.  Very comfy.  I'm all set for that long long long trip to Houston.

What would I do differently:  allow more time, make my pattern a little more accurate, and try to work when I am not tired.  My pattern was a bit sloppy and the fit is very loose.  I could have cut those pieces a little smaller.  Just very happy it is DONE.  Done is alway good!

Friday, January 29, 2010

Egret Mobile study = fabric art on the move

You have to be over 'a certain age' to remember Frank Sinatra belting out “My Way”.   I remember it well. As this project morphed from one thing to another the words, “I did it my way” kept floating through my mind.

The Fast Friday Fabric Challenge this month: something with wings, fractured, and done with only 3 colors out of the primary and secondary colors + black and white.

As I began to look at the suggestions for fractured things, mosaics appealed to me. Thinking on a grand scale I thought I would do a fractured water lily with an overlay of a dragonfly. I had some sheer fabric just waiting to be used. I found several dragonfly photos, blew one up to a size I thought I could stitch, ~20” long for a single wing. I'm thinking maybe I'll just do the wings as a mobile. By Sunday night I had finished tracing both parts of a single wing onto a sheer paper so that I could just turn it over to get the other side. Taking a break, I got something to eat. When I picked up the spoon to eat my soup, a horrible pain went through my fingers, hand and arm. I could not pick up a spoon without horrible pain. I took some Ibuprofen and sat down at the computer to read; just rocking and holding my injured arm.   I had stupidly injured myself. I definitely was not going to trace these again. Of course I was able to eat using my left hand.   Not much stops me from getting food into my mouth.

Dragon Fly Wing Drawings on my Work Table

The next day I took my drawings to a copy place. 4 to 5 hour wait. Nope. I just could not do that. Luckily I didn't do that because when I tried to stitch my sheer fabric over the paper, I could not get the paper out of those little bitty spaces. HMMM.

Butterfly Drawing with thoughts about making it into a mobile.

More research for a winged thing. I was now loving the idea of a mobile. As I surfed, I saw a GREAT plane with a man inside running across the ground. The wings were 3 high and the tail had lots of interesting pieces. I can now imagine this could really have a lot of movement. As I started drawing and planning, I realize I really didn't want a plane. How about a butterfly; hours later that was not working for me. I started looking at birds and mobiles. I did not want a flock of birds. Rather, my vision, was for one bird that I would fracture.  HMMM . . . an egret in flight.

Egret mobile with sheer bits, black wire and painted [also weighted] beak.

Finally, I have something I really like.  Luckily, I decided to do a small study instead of a LARGE piece.  Balancing the pieces was tricky for me. I used thin black wire and bent my shapes and attaching rings. I pounded the shapes a little to give them a little stiffness and help them keep their form.  Because normally these things are done using heavier materials then soldering a ring at the balance point, I added weight [extra wire] when I did my balancing. The beak is really lots of wire, wrapped, then painted. I sewed a layer of sheer fabric to each side, stopped the fray with liquid stitch, then purposefully frayed the edges, ie feathers.
Egret mobile view from kitchen.

Egret mobile from dining [now quilt art studio]

I have no idea why this is turning up yellow in this photo.  It really is two different sheer white fabrics.  I used one fabric on one side and another on the opposite side.  I sewed with a clear polyester in the bobbin and a silver thread on top.  As I researched fabrics, polyester is the most resistant to sun and age deterioration.  This was the reason for my fabric and thread choices.  This is so lightweight that it is continually in movement = success for a mobile.

Remembering the goals of this group: “it is through doing that we will learn.” Yes, I learned a lot. Plus, the end of the challenge always states something similar to , “remember to have fun”. Please note it is the Fast Friday Fabric Challenge; not a quilting challenge.

Yes, “I did it my way. . . "

Saturday, January 23, 2010

Morgandy's First Birthday gift

For a few hours on Mondays, I babysit  the adorable baby next door. Today is Morgandy's first birthday. For this occasion I created a new rocking chair back to replace a rattan one that had been punched out by a 4 year old boy. Of course I've had this chair for a while. I took all the loose joints apart and re-glued them. It is now really sturdy. Then I pulled off all the bits and pieces of rattan. After a final cleaning;  I got my canvas and began painting.


Morgandy means 'Little One by the Sea.' So of course I painted a little girl at the edge of a big body of water. I used unprimed canvas and acrylic paints. I knew this would work because I painted a skirt with acrylic paints 30 [or more] years ago. They do make the fabric stiff, but in this case it would make it better to be stiff. I do not like acrylics for my regular wall quilts because I do not like the stiffness. The painting is simple, and was easy. The assembly was hard. The back is larger at the top than at the bottom; it is also curved.  Because of my distracted, grieving mind I first sewed it together making the top 1" too narrow. This is tough stuff to sew, but rips out easily. Then of course I had to repaint a bit to cover those lines. After sewing to the correct size, I trimmed the corners and turned it right side out. This is very hard stuff to work with. Getting it turned right side out is a job in itself. I intended to quilt it. However just stitching a band around the edges, was difficult. I used a #16 needle, the largest I had. At this time, I decided not to quilt. It was even difficult to bury the thread from this little bit of sewing. However, by stitching that band, I had 4 pieces of canvas acting as one at the edge where it will get the most strain. I think it is strong enough for a little girl.
.

Then I used carpet thread to sew it into the existing frame. That was the hardest job. After I had the top installed [little over 8 hours], I wished I had my old grommet maker. If you are going to do something like this, and I highly recommend it, use grommets to line up with the holes and then it can easily be laced into place. I feel writing about my mistakes, helps any reader avoid them. One of those, "do as I say, not as I do" sort of things.  I do hope this was a good learning experience for you; it sure was for me.

Saturday, October 31, 2009

Blast Off

This project began as an FFF Challenge. The theme was space.

I spent days looking at marvelous photos from the Hubble Telescope. However, as much as I was in awe of the photos, nothing spoke to me. Finally I hit upon this theme = going into outer space.

I wanted to use dyes, but my past experience had been just painting the dyes on a piece of cloth laying on a table. It didn't work as I had envisioned. Lots of flow across the table; very little control. Therefore, my first step was to make an adjustable frame on which to secure my fabric. I recycled wood from some old frames I had used when I lived in apartments and moved a lot. These were very flexible, but no longer needed. I think the photo explains it very well.


Old side rails from my portable shelves


Side rails recycled into a frame for dying and painting

I lightly sketched my rocket, platform, and buildings as seen from across a bit of water. I used a textile maker in gray as I only wanted a little bit to show threw the 'dust from the blast off'. Then I applied dyes. It took several layers of dye to get what I wanted. Then I began with the paints. I ironed between layers to preserve what I had already done. Previously, I had skipped this step. Not happy when the colors moved. I learned from that mistake.


Sketch on stretched fabric on frame


Dyed with painting started

When I was satisfied, I added an inner border of a very soft brown and an outer border of a dark purplish-blue. I spent two days interviewing borders. I was very invested in this step. I thought the brown was perfect. Fortunately, I had just barely enough to do a 1\4” border. Then I started quilting. That took a while. I messed up on the inner border, but tried for days to save it.


I was in love with these borders. Hard to cut them off.

FINALLY, I realized the borders had to go. This was hard. It was after reading from the Quiltart list that I knew I had to do it. I don't remember who, but someone said something that has stuck. It was similar to , 'If you are in love with one piece of fabric maybe that is what needs to go.' I sure wanted those borders. Cutting them off lost 7” in both horizontal and vertical directions, plus I was in love with both fabrics. However, as it turns out, cutting them off was absolutely necessary to achieve the final result. I know it is not perfect However, it is the best I've quilted so far. I darkened the details to better show the quilting. The full art quilt is truer to the actual colors.


BLAST OFF 17" x 37.5"


Blast Off darkened detail 1

Blast Off darkened detail 2


My name, Ann E. Ruthsdottir, machine embroidered on the front.
It actually is hard to see because the color blends in so well.
However, it would be quite a job to take it off.
I had to lighten the photo in order to see my name.

Comments welcomed and appreciated.

Saturday, November 8, 2008

top down Roman Shades insulated and quilted

I just finished making insulated Roman shades. I used the existing professionally made Roman shades as a pattern. There are many different types of Roman shades. Because my original shades have the center sway and the side end flips, my insulated shades follow that style.

Original decorative shades in original location.


Original decorative shades moved forward to make room for the insulated shades behind.


Layers of fabric= ironing board fabric with metallic side facing the window, Warm company Insul-Bright, 100% cotton batting, muslin on the room side.


I quilted straight lines where I would put the rings; wavy lines in between. Straight lines down. Rings go where the straight lines intersect. Muslin wrapped around edges. Top shows Velcro fastening. Other half of Velcro is stapled onto the board.

Rings sewn at crossing straight lines.


The original decorative shades had gathers in the Velcro using string woven through. I simplified that process my simply easing the excess fabric to Velcro cut to the correct width.


Pocket made in the bottom of the shade in case I want to insert a weight later.


I used recycled 1x2 to make the shade attachment. Covered the 'show' side with double layers of muslin. Stapled on Velcro to the 'front' to hold the shade.


I used a staple gun and tack hammer to wrap wood with clothe and staple the Velcro to the 'front' of the wood. I hammered in the staples tighter with a tack hammer. I only used the 3 eye-screws shown because of the style I chose. I screwed the wood inside the window framing with 2 long screws.


I used all Warm products: Insul-Bright, cotton batting, metal rings, pull cord and screw eyes. Other brands could be used. These seemed the best available to me.


Photo shows the cording going through the rings [tied off at the bottom ring] and then up through the pulling screw eyes.


Both shades down = very warm


Decorative shade up; insulated shade down.


Both shades up.


Sizing the shade: my window measures 31" x 43"; I cut the insulation fabric 33" x 45"; finished shade measures 32" x 43.5" >>>>>conclusion: width is fine, however, next time I would add more length. Quilting naturally shrinks the size. Extra length would be nice.
Check out this link for a good diagram of rings and stringing method

Wednesday, July 30, 2008

The Retrospective Theater

I have been given the OK to show my quilt, The Retrospective Theater. It was recently exhibited in an International exhibit in Hollywood, California. I've heard from many who went that is was a fabulous exhibit. All of the exhibits had accompanying three dimensional settings to add to the theme of the quilts. Each category had it's own special space. The 'Silver Screen' exhibit which my quilt was a part of, had old movie reels, old film strips, and general paraphernalia from old films. The exhibit everyone raved about was the real 'woody' parked on the sand in the 'Surf's Up' exhibit because it brought back so much nostalgia for those of us who remember such things.

I'm just excited to have be shown in such a wonderful, totally juried exhibit of this quality. My quilt will now travel for a year to other International shows of what I consider, the highest caliber.


Explanation of my quilt design.

The category of the 'Silver Screen' caused me to think of academy award winners, memories of old bill boards, dreams of an ideal movie theater with fine dining and entertainment = a gathering place for movie lovers.

What is more Silver Screen than the Academy Awards? My theater only shows academy award winners. At the moment it is a triple slam: the only 3 movies that won the 5 major academy awards.

Of course on Sunday afternoons the Bistro features a photo fashion show; each week different award winning designers are featured.

On weekends, for the late night folks, Theater 1 shows films where the director won the Oscar.

My bill board advertisement expresses my desires for an ideal theater venue. As well as acknowledging and honoring the award winners. It strives to respond to patrons desires in order to have a viable enterprise.

Techniques used: piecing, raw edge, fusing, photo transfer, printing, and painting.

This is a photo of my whole quilt ~42"x60+" hanging on my quilt wall in my dining room. All of the text/advertisement was made up by me to enhance my idea.


Sketch for the 'movie clip'.


Close up of the raw edge movie clip. I made this using pieces of fabric and fusing them to a background to make the picture. Notice how I needed to change the book. Had it all wrong in the first sketch.


Close up of the close up so that you can see more detail about how I made the piece.


This shows how I blocked the quilt. The layout 'lines of yarn' are the dimensions that it should be according to my guide/plan of what I was doing. You will notice some 'shrinkage'.


Blocking corner closeup.


More about the process of making the quilt for those of you are are not totally saturated.

Fabric ironed and pinned to a board. This is my pallet.


Testing fabric contrast for letters.


Fusing material and fabric for letters. After fusing the fabric to the material, I cut out each letter and then ironed it in place.


Fusing the quilt title letters.